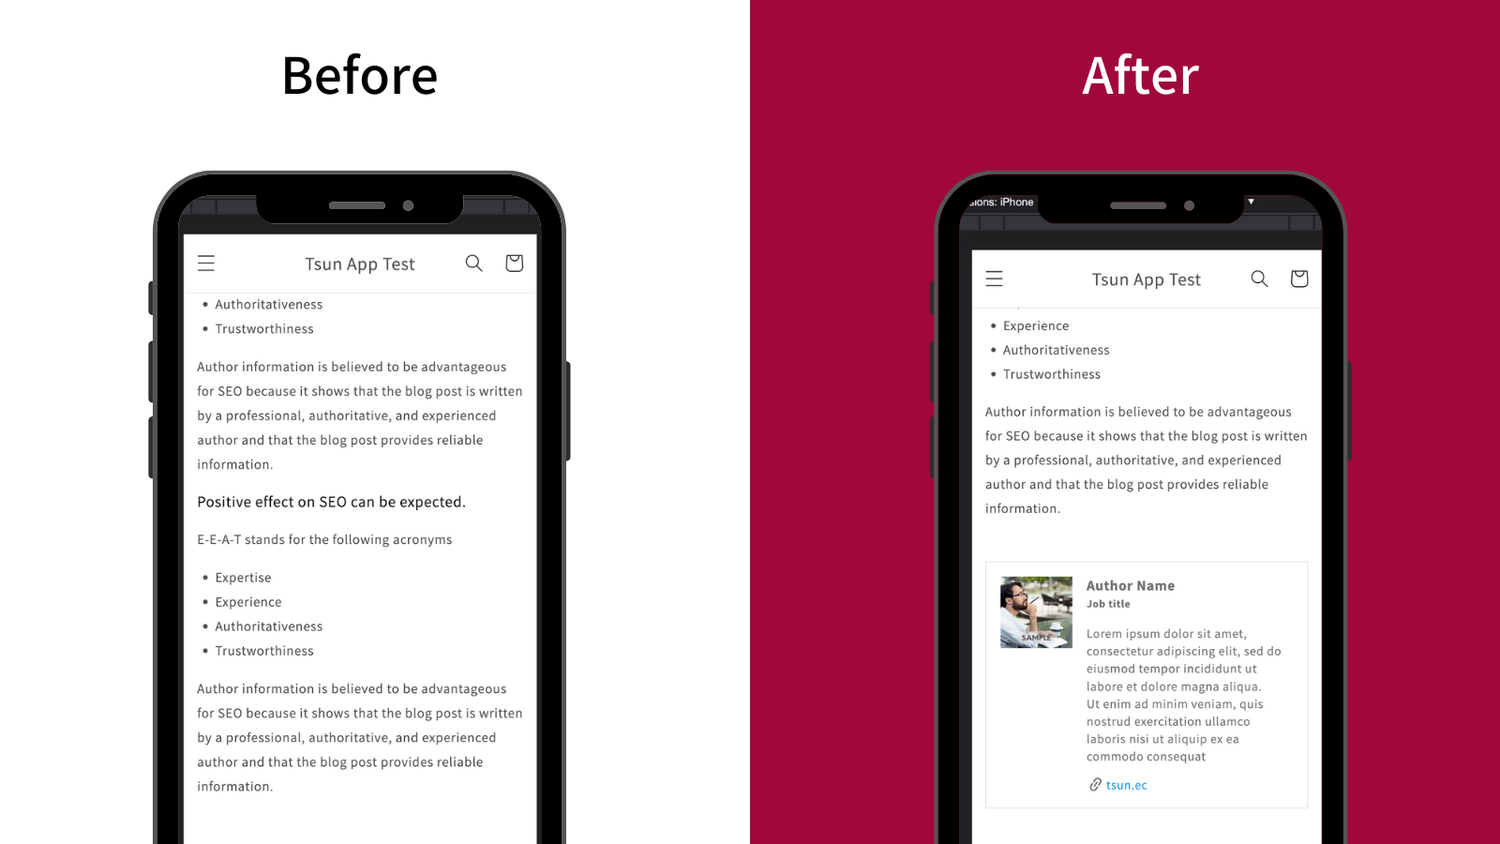
Displaying author information on your Shopify blog posts can increase content credibility and improve user engagement. However, Shopify's standard blog feature has limited flexibility — for example, it can only display the author's name.
This article explains the following three methods for displaying author information on Shopify, comparing their features, advantages, and disadvantages to help you choose the best approach.
- Selecting an author using the blog feature
- Customizing the source code
- Using a Shopify app
What Is Author Information?

Author information refers to details about the writer of a blog post. Displaying it can help increase content credibility and improve user engagement.
Shopify offers several ways to display author information on blog posts, each with its own characteristics, advantages, and disadvantages.
Comparing 3 Ways to Display Author Information on Shopify
| Method | Characteristics | Advantages | Disadvantages |
|---|---|---|---|
| Select via blog feature | Uses the standard feature as-is | Simplest option, no setup required | Can only show author name; staff only |
| Customize the source code | Flexible via code editing | Highest flexibility, resolves all limitations | Requires programming knowledge |
| Use a Shopify app | Can be implemented with no code | No knowledge required, no staff limit, flexible design | Incurs a monthly fee |
Selecting an Author Using the Blog Feature

This method lets you select an author from Shopify's blog editing screen.
This is the simplest method — when creating or editing a post under "Online Store" > "Blog posts", simply choose an author from the author select box.
Disadvantages
- Only the author's name can be displayed
- You can only choose from staff members registered in Shopify
If you want to display a more detailed author profile, or show more authors than you have staff members, you'll need to consider one of the other methods.
Customizing the Source Code
This method involves customizing the source code directly.
By customizing the source code directly, you can add extra information beyond the author's name to the author set via the blog feature, or combine it with metafields and metaobjects to display author profiles for people who aren't Shopify staff members.
- Advantage: This method offers the highest degree of freedom and resolves all of the disadvantages mentioned above, such as being unable to show information beyond the author's name or unable to show more authors than you have staff.
- Disadvantage: It requires programming knowledge, which makes it difficult for non-engineers to implement.
Using an App
Finally, there's the option of using a Shopify app.
Using a Shopify app can resolve all of the disadvantages of the two methods above: limited author information, staff-count limits, and the need for programming knowledge.
- Disadvantage: Shopify apps may cost a monthly fee starting at a few dollars.
Recommended Shopify App: RuffRuff Author Profiles

RuffRuff Author Profiles is a Shopify app that makes it easy to display author profiles on blog posts, products, and pages. It's simple to set up with no coding required, and you can register an unlimited number of authors (on the Regular Plan). Note that displaying profiles on products and pages is a Regular Plan feature — on the Free Plan and Light Plan, profiles can only be displayed on blog posts.
There's also a Free Plan, so you can try out the features before deciding whether to upgrade to a paid plan, making it easy to get started.
Using the app can help increase content credibility and improve user engagement.
How to Display Author Profiles on Blog Posts Using RuffRuff Author Profiles
Step 1: Add the App to Your Shopify Theme

(1) From the "1. Enable an app in a theme" section on the home screen, select the theme you want to add the app to
(2) Click "Access"

(3) Click "Add section" (or "Add block")
(4) Select the app block named "Author Profiles"
(5) (Optional) Move the app section to your preferred location
(6) Click Save
Step 2: Customize the Profile Design

(1) On the app's home screen, click "Customize" in the "2. Customize design" section

(2) Adjust the design on the design customization screen
(3) Click "Save"
Step 3: Register Author Information

(1) On the app's home screen, click "Add author" in the "3. Add authors" section

(2) On the author list screen, click "Add author"

(3) On the author information screen, enter the required details such as the author's name and profile information
(4) Click "Save"
Step 4: Link Authors to Blog Posts
(1) On the home screen, click "Apply author" in the "4. Apply the author" section

(2) On the blog post list screen, select the blog posts you want to apply an author to
(3) Click "Apply author"

(4) From the popup that appears, select the author you want to apply
(5) Click "Apply"
Conclusion
There are various ways to display author information on Shopify blog posts — from the simple standard feature, to customizing the source code, to using an app. Each method has its own advantages and disadvantages, so it's important to choose the one that best fits your goals, skills, and budget.
In particular, using the Shopify app "RuffRuff Author Profiles" lets you display flexible, detailed author information with no coding, making it a great option for non-engineers too. We hope this article helps you find the right approach.